Creating PPP Lesson Plans: How to Teach ESL Effectively
The secret to having students be enthused, energetic learners is all in the lesson plan. Using the PPP structure for your lessons will help you stay on track, deliver new material effectively and most importantly, help your students build new English skills.
PPP is a lesson plan template that consists of Presentation (P1), Practice (P2) and Production (P3), and it’s often used for ESL classes. It focuses on giving students a solid foundation for new concepts, then encouraging them to apply these on their own.
Read on to learn how to deliver awesome ESL lessons with the PPP template.
Contents
Download: This blog post is available as a convenient and portable PDF that you can take anywhere. Click here to get a copy. (Download)
1. Presentation

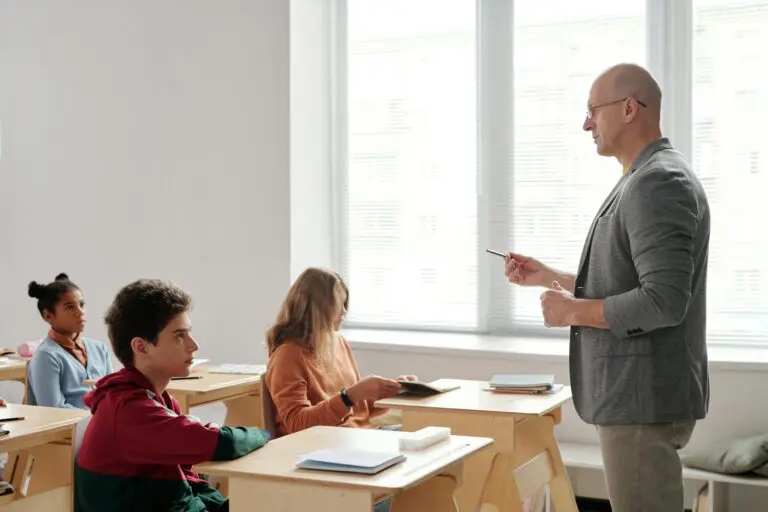
Presentation is the first step, and it’s also the most important. This is your time to shine because it’s the main part of teaching: you’ll be explaining new concepts to your eager students.
At this stage, teachers should talk approximately 75% of the time.
Make your lesson exciting and relatable
Remember how boring it was when you had a teacher who only lectured, with little enthusiasm? Well, don’t be that teacher—break the mold and become animated. Students learn through context, so tell a story or use resources that excite students to learn more. Peaking interest is essential.
To lead students into the lesson, you can start with something familiar, such as material discussed in a previous class. For example, if you’re talking about house vocabulary, focus on the bedroom first, then break down the vocabulary inside of the bedroom.
Show visuals like photos and videos
Use visuals to stimulate understanding and get your students curious about a topic.
If you are presenting key places in a city or town, using pictures of your students’ town/s will invoke interest and be relevant to their world.
For teaching home-related vocabulary, you can display photos from your home, relating them to relevant vocabulary. After that, show your students how to use vocabulary nouns with prepositions of place through statements like “The toaster is on the counter.”
Ask thoughtful questions
Once introduction is complete, you can then guide your students to analyze the material more closely. You are still in control of your classroom so keep presenting, but ask questions and make your students think more about what it is they are seeing and hearing.
Questions are also great for checking if students understand the new material. Don’t let them off the hook so easily. Try not to tell them answers, allowing them to work it out in English!
2. Practice

Practice is the second stage of the PPP lesson plan template. This is when you will hand over a bit of control to your students and let them try out the new material themselves. If your presentation was well-developed and awesome, your students will be more than ready to jump in.
In this stage, you will give your students a set of tasks or activities. These tasks should be challenging and only solvable with the new material, but not too difficult.
The students will do most of the talking since they’ll be going over the material with you and their classmates. Generally, you can aim to let your students speak 65% of the time and just jump in every now and then to point out something new or answer questions.
Guide your class through exercises
For a smooth transition into the practice stage, do exercises together with your students first, or work through questions together.
To continue with the same example of rooms in a house, a great practice activity would be to let your students label nouns and prepositions of place around the room. There are many techniques for this, and you can go around the room looking out for trouble areas and helping out as needed.
Do pair and group practice
Once your students get more used to the material, you can begin pair and group activities.
Allowing students to brainstorm and work together will encourage them to communicate more and learn about their classmates. For groupwork, you can even divide the class and organize a contest to make them more eager to focus on the material.
3. Production

Production is the final stage in a PPP lesson plan. This is also referred to as the fluency stage—your students will now be like birds leaving the nest for the first time.
In the production stage, teacher talk time is at its lowest and almost nonexistent. Let your students be creative and develop their own work, speaking 90% of the time to your meager 10%. It’s important for them to gain confidence in English on their own.
Set up writing or speaking activities
Most production activities involve writing or speaking, and sometimes both are combined if necessary. This allows your students to build confidence and be creative when using the new material, as it’s solely in their hands.
Carrying our example house vocabulary lesson through the final step, you can now let your students craft a short story or presentation involving the many things they have in their own home. They can write a script and present it to the class during production.
Encourage production through groupwork
Similar to the previous stage, you can separate your class into pairs or groups for production. They can construct dialogues, monologues, scripted plays and so on together.
One great pair exercise you can use is to have two students create a script using the new material and then let them act it out in front of the class.
What Makes an ESL Lesson Plan Exceptional?
- Clear aims and objectives. First off, make sure you have a good understanding of your main goal for the lesson and how you propose to reach that goal. It’s also a great idea to share these with your students so they’ll know exactly what they will accomplish.
- Grading. Careful, we’re not talking about correcting work and giving letter grades here! This is the concept of climbing a hill, starting off with something easy or relatable to your students and then making the material more challenging as you ascend.
- PPP structure. This is one of the most used lesson plan formats in ESL. PPP (presentation, practice, production) allows you to develop a structured, graded and time-efficient lesson plan that conveys the material in an understandable way.
- Effective time breakdown. Knowing when you should talk and when you should allow your students to engage is another key component. One strategy is jotting down time limits for each activity in the margins of the lesson plan sheet. For the PPP structure, a good time allotment might be 15 minutes of Presentation (P1), 20 minutes of practice (P2) and 25 minutes of production (P3).
- Relevant material. Take a few moments to gauge your student’s level, their interests, hobbies, work and home life. Consider showing videos, trending articles and other native content that your students would enjoy. For instance, FluentU features English media clips with interactive subtitles and transcripts for learners.
FluentU takes authentic videos—like music videos, movie trailers, news and inspiring talks—and turns them into personalized language learning lessons.
You can try FluentU for free for 2 weeks. Check out the website or download the iOS app or Android app.
P.S. Click here to take advantage of our current sale! (Expires at the end of this month.)


A great, fun and material-rich lesson will keep your students encouraged to learn more and build their confidence as English speakers.
So for lesson plan success, be sure to construct a well-developed and exciting lesson plan using the PPP template. Good luck, and enjoy!
Download: This blog post is available as a convenient and portable PDF that you can take anywhere. Click here to get a copy. (Download)
And One More Thing...
If you like learning English through movies and online media, you should also check out FluentU. FluentU lets you learn English from popular talk shows, catchy music videos and funny commercials, as you can see here:

If you want to watch it, the FluentU app has probably got it.
The FluentU app and website makes it really easy to watch English videos. There are captions that are interactive. That means you can tap on any word to see an image, definition, and useful examples.

FluentU lets you learn engaging content with world famous celebrities.
For example, when you tap on the word "searching," you see this:

FluentU lets you tap to look up any word.
Learn all the vocabulary in any video with quizzes. Swipe left or right to see more examples for the word you’re learning.

FluentU helps you learn fast with useful questions and multiple examples. Learn more.
The best part? FluentU remembers the vocabulary that you’re learning. It gives you extra practice with difficult words—and reminds you when it’s time to review what you’ve learned. You have a truly personalized experience.
Start using the FluentU website on your computer or tablet or, better yet, download the FluentU app from the iTunes or Google Play store. Click here to take advantage of our current sale! (Expires at the end of this month.)
9 Popular Songs for Teaching English
Songs are a fantastic way to help students work on different elements of language learning. There are many different ways…