17 Amusing Art Activities for Eager ESL Students
From glittery Easter eggs to dried pasta necklaces, art activities are not only memorable, they’re incredibly beneficial for ESL students.
Art-based activities can teach your students essential language skills in a new way, forming the base they can fall back on when in a real-life English situation years down the road.
I’ve picked out 17 ESL activities that creatively combine art with language for some unforgettable ESL lessons!
Contents
- 1. Holiday Themes
- 2. Simon Says Art
- 3. Starry Night at Home
- 4. Learning the Body
- 5. Wish You Were Here
- 6. Coloring with Words
- 7. Interview the Subject
- 8. Texture Study
- 9. Mapping Your Town
- 10. Visit an Art Museum
- 11. Favorite Fruits
- 12. Student Art Show
- 13. I Am Collage
- 14. Match the Picture
- 15. Story Swap and Sketch
- 16. Picture Bingo Boards
- 17. Pictionary
- Tips for Using Art Activities in Your ESL Class
Download: This blog post is available as a convenient and portable PDF that you can take anywhere. Click here to get a copy. (Download)
1. Holiday Themes

Holiday themes are exceptional ways to not only allow your students to create fun artistically minded projects, but it also helps them assimilate a bit more into English culture.
ESL art activities for holiday themes can cover a wide array of holidays, including Easter, Christmas, Thanksgiving, Valentine’s Day and many more.
One holiday theme that can work for all ages and ESL levels is Valentine’s Day.
For this project, your students will be crafting a Valentine’s Day card for someone they care about. This can be easily entertaining for students of all ages, since love is the second universal language to English.
Essential Materials
- Pink, red, blue and white paper
- Scissors and glue
- Glitter
- Assorted markers
Instructions
- Give a bit of history about Valentine’s Day and how it’s practiced in North America. You could even see if your students have a similar holiday to compare it to.
- Next, bring in and show your students a Valentine’s Day card you created prior to the class. This will give them a visual to work from.
- Before they begin crafting, cutting and glittering away, have a classroom brainstorm session about what they want to write. Let students share the emotional words related to such a holiday theme. You can even put them in groups and let them discuss what might go into a great Valentine’s Day card.
- After the brainstorming is complete, let them loose to begin creating their very own Valentine’s Day card for a loved one.
It goes without saying, this art activity works best when done around Valentine’s Day, but why wait? It could be fun to express love at any other time of the year as well.
2. Simon Says Art
I have no doubt that you have played Simon Says in your ESL classroom. It’s a great way to practice listening skills and get students moving, and you can adapt it to be more art-oriented.
Essential Materials
- White paper for each student
- Colored pencils, crayons, markers or drawing pencils
Instructions
- Prepare vocabulary words related to colors, shapes and prepositions of location that you’ll be using for the instructions.
- Before the game, consider reviewing your students on these vocabulary words, whether by simply repeating and practicing the words out loud as a class or using visual aids.
- Distribute the sheets of paper among the students, then tell them you’ll be giving them directions for what to draw instead of directions for body movements. For example: Simon says draw a line here. Simon says draw a circle in the top left corner.
- For an extra challenge, you can try playing “big art” or “art outdoors” in Simon Says format. This way, students can have more space to draw (or even do fingerpainting) or even draw on the ground with chalk.
- After the game, give students the option to display their artworks in class, then ask them about any confusing instructions and discuss those together.
What’s great about this activity is there are a lot of ways the students can interpret the instructions, so they can exercise both their listening skills and creativity.
3. Starry Night at Home
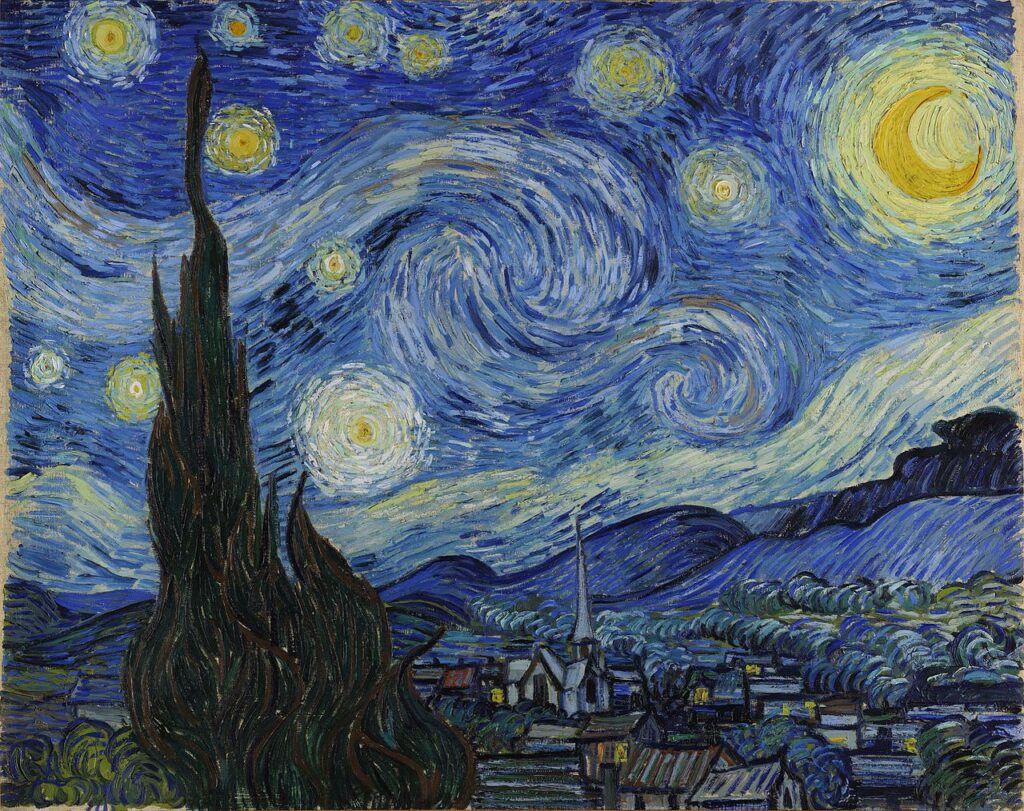
In this art and language activity, students will create their own starry night inspired by Van Gogh’s well-known piece.
Essential Materials
- A large picture of Van Gogh’s “Starry Night”
- Pictures of cityscapes for reference
- White paper (two sheets for each student)
- Blue and black paint
- Glue
- Small pins
Instructions
- Have students tell a partner first about their home.
- Show students “Starry Night” and discuss how Van Gogh used colors to convey emotions. You might also have students talk about how different colors elicit different emotions in them and in others.
- When you’re ready to start the creative portion of the lesson, ask students to draw a cityscape along the bottom of a piece of white paper and then cut it out. It might be a city they know or one they imagine. You might want to have a few pictures available in class for students to reference.
- When their cityscapes are drawn and cut out, students should blob blue and black paint on another piece of white paper, fold it together and smear the paint around so it resembles the sky of Van Gogh’s painting.
- If you like, invite students to scratch swirls and other marks into the paint using the head of a pin or other object.
- When the paint is dry, students should glue their cityscape to the bottom of the painted paper to create their own starry night.
Your students will love this creative activity that lets them describe a place and connect a piece of their home with a classic piece of art.
4. Learning the Body
In this activity, your students will create a small skeleton and discover new vocabulary relating to the different parts of the body. This is a great activity for Halloween, since skeletons are closely tied to this North American holiday.
It’s appropriate for students of all ages, since I have met many adult professionals who have fumbled with the word for arm, hand and leg.
Essential Materials
- You will need to draw out different body parts on a piece of paper or find a worksheet on the web. They don’t need to be huge by any means, only large enough for your students to write the name of the body part in the designated areas.
- Scissors
- Glue
- Colored pencils, crayons or markers
Instructions
- First, give your students the tools for success. Presenting vocabulary is the best practice, but only use your body as a reference. Let them look at their skeletons with a keen eye when it comes to naming the different body parts.
- Once all body parts have been discussed, pair your students up and pass out the skeleton worksheet filled with assorted body parts scrambled about.
- Instruct your eager students to collaborate with their partners and begin cutting and gluing their skeleton together.
- Once they feel good about the anatomical correctness of their creations, instruct students to begin naming the different body parts using multiple colors to identify each. For example, arms will be green and legs blue.
- Float and answer questions as needed. You can even correct a few arms which should be legs as well.
This activity is a great way for students to practice writing and spelling, since they write down new body vocabulary in each section. It’s a wonderful activity to increase practical awareness and give students a visual to draw from later in their English lives.
5. Wish You Were Here
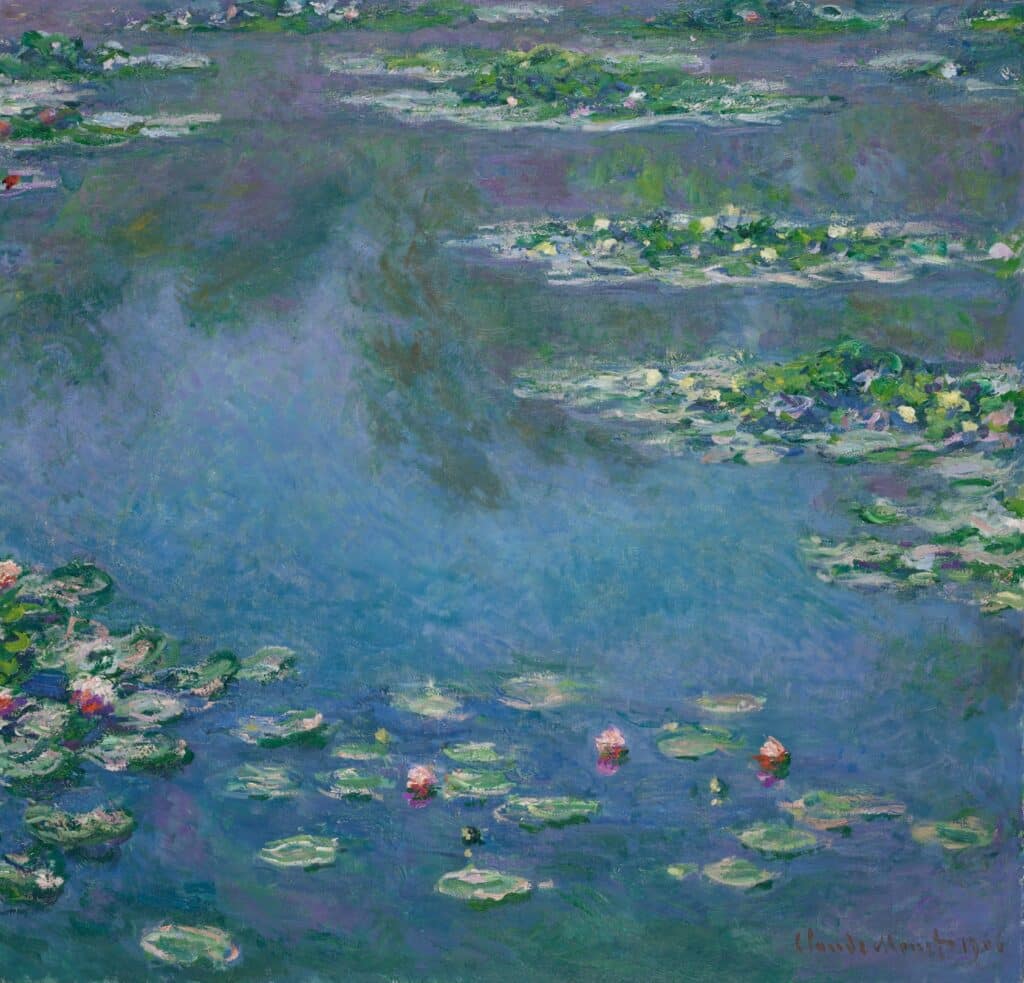
Whether you consider yourself an art aficionado or not, you will love how classic paintings can get your students talking.
Essential Materials
- Pictures of classic paintings for each pair of students
- A list of questions for discussion
Instructions
- Bring in some pictures of classic paintings, at least one for every pair of students in your class. You can have everyone use the same painting or have different options. You might want to consider Monet’s “Water Lilies” series or Munch’s “The Scream” for this activity.
- Give each pair of students one painting to look at.
- Have the students imagine they are in the painting.
- Direct them to talk about why they are there and what they see. You can get them talking by giving specific discussion questions, like “How do you feel when you look at this painting?” or “Imagine you’re a character in this painting.”
Aside from speaking practice, this activity is a great way to practice present and present progressive tenses, and to introduce and use unusual vocabulary depending on what painting students are discussing.
6. Coloring with Words
This vocabulary-focused activity is great for ESL students from kids to teenagers, and works best when discussing animals and scenery. It involves taking a predesigned picture and writing the words over and over in order to color in the specific feature.
For example, a mountain would be colored in with brown. Your students will color in the mountain by writing the word “mountain” over and over in brown.
Essential Materials
- Worksheet containing mountains, rivers, grassy plains and maybe even a few animals. You can design your own worksheet or find a plethora of printable coloring sheets on the web. Keep in mind that you want the features in the worksheet to be large enough for your students to write the corresponding vocabulary words a few times in each area.
- Colored pencils, markers or crayons
Instructions
- In your presentation, have your students discuss as a class the different visuals you will show them. If the worksheet has mountains, you will discuss mountains. You will want to give your students the vocabulary (and spellings) necessary to succeed in the activity.
- Put the students into groups. This allows them to discuss, share their thoughts or ask questions while working on the project.
- Once they’re in groups, students can begin. Challenge them to really fill in the features completely. You can even show them that linear is not always the best way to create a three-dimensional picture. Give them the opportunity to write mountain diagonally and grass horizontally to add a more artistic touch.
This art activity introduces your students to new vocabulary and spelling skills essential for their growth.
It’s often difficult for young ESL students to recall the names of animals or geographical features on the spot. This activity gives them something to fall back on in those times when they’re trying to describe a vacation or maybe their hometown.
This activity is also perfect for any new vocabulary words relating to features of the home, town or even specific places like a hospital, school or supermarket.
7. Interview the Subject

This is another art activity that uses classic paintings, but this time students will be looking at a portrait and interviewing the person painted in it. You might consider using the “Mona Lisa” or any other classic portraits.
Essential Materials
- One portrait for each student
- Sheets of paper for writing
Instructions
- Before the activity, brainstorm a list of interview questions with your class.
- Once you have a good bank of questions, give out the portraits to your students.
- Have each person imagine that they are interviewing the person in the painting. They should choose five to ten interview questions (or whatever you think is appropriate for your students’ language level).
- Students will then write down a fictitious interview between them and the person in the painting. They should imagine how their subject would answer the questions and write those questions down. As they write, they should use either direct quotations or reported speech.
This activity gets students to practice asking questions and doing interviews. They also get to use reported speech or indirect communication in the form of “He / She said…”
8. Texture Study
In this activity, you’ll be giving students a much more vivid understanding of texture words in English by having them draw these words.
Essential Materials
- Copies of West Branch School District’s texture handout for each student
- A list of vocabulary words related to texture
- Sheets of white paper
- Black pens or fine-tip markers
Instructions
- Give the texture handout to your students and let them read about texture on the worksheet.
- Write down a list of words related to texture on the board, such as rough, smooth, slippery, scratchy, grooved, etc.
- Then have students try their hand at creating their own textures on, well, their hands. Students should trace their hand on the white paper.
- They can then fill in each finger with a different texture. They can use the textures on the handout or create their own.
- Pair students to talk about the textures they drew and what items have those textures. Encourage your students to use the words on the board.
Your students might not use texture words as much in casual conversation, so this activity will expand your students’ vocabulary and improve their descriptive skills in English.
9. Mapping Your Town

This activity is a great directional activity and allows your students to craft semi-detailed maps of their town. It’s also a wonderful way for your students to pick up some essential vocabulary regarding areas around their town, such as hospital, church, post office, gas station, park and many more.
Essential Materials
- Large rectangular paper, which will act as the drawing board for your students’ maps. It’s great to have each student name their town on the top-center before they begin to create their map.
- An assortment of pens, markers, colored pencils, crayons and rough-draft drawing pencils
- Optional: A worksheet with the different areas one may find on a map. This will help guide your students and allow them to think about the different places they can reference on the worksheet and how it may relate to their home, which will be used as the starting point.
Instructions
- Give your students a detailed visual of what they should create. You can make a map of your town to show them.
- Use your map to present the different types of places that can be found around your home. A good example of this would be the very animated tourist maps you may find when traveling to touristic towns. They are often more fun and have a comical three-dimensional feel.
- Present the worksheet and the different types of places found in an average town. Have them go down the list with you and the class and check off or circle the specific places that are near their home.
- Have your students place their home in the center of their map as the starting point. Instruct them to choose an initial place they can draw, which is just a street away from their home.
- After all questions are answered and they have a visual reference in mind, let their creative map-making skills run wild.
This vocabulary-building exercise can easily be coupled with a directional activity after your students have finished designing their maps. You could have them present how they get to school using directional vocabulary.
Your students will also practice writing as they label each place on their map, and gain the practical skill of giving directions.
10. Visit an Art Museum
Taking a day trip to a museum might not be something you can do at the spur of a moment, but it does make for a great language-focused field trip for ESL students. You might be surprised to find there are more museums near you than you might think.
The works of art do not have to be famous or expensive; even a local museum will serve the purpose here.
Instructions
- Take your students to the museum and give them some time to look at the various artworks there.
- Ask students to make notes on what they see and how the various paintings make them feel. They can also take pictures of the pieces if the museum allows it.
- Bring students back together either at the museum or in your classroom.
- Each person should tell the class about how one artwork made them feel without identifying which piece of art it was. Students can give hints about colors and subject matter after they have talked about how the painting made them feel.
- The rest of the class should then try and guess which painting the person is talking about.
This is a great chance for your students to talk about emotions as well as using descriptive language.
Still unsure about visiting a museum? Take a virtual tour instead. You can view collections at The National Gallery of Art or The Louvre without even leaving your classroom.
11. Favorite Fruits

This activity is an exceptional way for your students to build vocabulary, spelling and grammar. Students will create beautiful displays of artistic fruit and then discuss what they like about each fruit they have chosen to draw.
Essential Materials
- White paper for drawing (2-3 sheets for each student)
- Colored pencils, crayons, markers and drawing pencils
Instructions
- Give students a visual to work from first. Show them a whacky drawing of your own. It can be an oddly shaped apple or skinny pineapple. The key aspect of this activity is fun and creating things differently.
- You can even show your students a few famous portrayals of different fruits drawn or painted by famous artists in your presentation. This may spark more creativity and it will definitely spur some discussion among students.
- Let each student pick a fruit of their choice to draw and get started. Emphasize that they don’t need to make it in any way how it actually appears. This artistic freedom will allow them to use their imaginations.
- After all art has been crafted, ask each student to write the name of their fruit. Then have them flip over their drawing to the blank side of the paper and guide them through a series of questions. For example: How often do you eat this fruit? Why did you draw your fruit this way? What other fruits do you like to eat?
This activity allows your students to build vocabulary, work on grammar and sentence structure and practice writing. It can be done with any type of food, not only fruit. Let your students explore new ways to express themselves through art and English.
12. Student Art Show
Give your students a chance to communicate about feelings without having to use words in this classroom art activity.
Essential Materials
- Colored pencils, crayons or markers
- White paper for drawing (2 to 3 sheets for each student)
- Visual aids in the form of example paintings
Instructions
- Brainstorm a list of emotions with your class.
- If you like, take a few minutes before creating to talk about how other artists have communicated emotions through their works. You can show these paintings, such as fear in “The Scream,” tranquility in “The Water Lilies,” etc.
- Set your students free to create something that communicates one of those feelings with whatever materials you have on hand.
- Once everyone has finished their projects, give each student an opportunity to present their piece to the class.
- Let the other students share how that piece makes them feel, then talk about the artist, including how they were feeling and what they were thinking when they created it.
This activity will give students speaking and presenting practice, as well as giving them a chance to talk about emotions. They’ll also be able to remember each emotion word vividly because they’ll form more intuitive associations with it.
13. I Am Collage
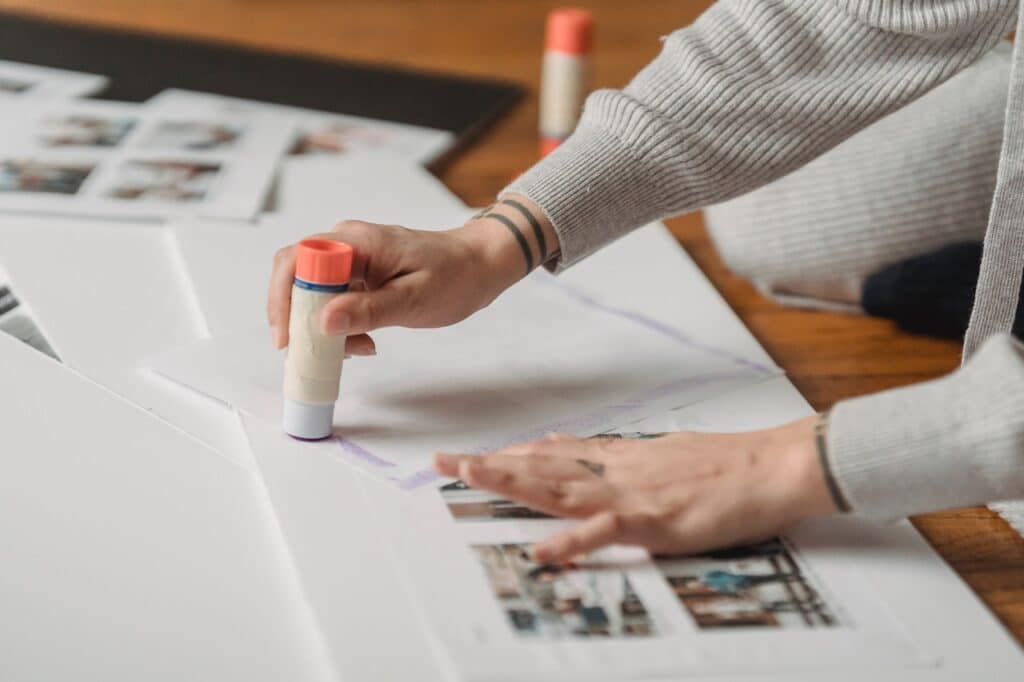
How well do your students really know each other? They may learn some interesting things about their classmates when each person makes a collage describing themselves.
Essential Materials
- Magazines
- Scissors
- Glue
- Paper plates or circular pieces of paper
- Pens, markers or crayons
Instructions
- Have students draw spokes on the plate to make six to eight sections.
- Then, students should cut out several pictures from magazines to fill in each section with one color.
- Once their plates are full, have students cut adjectives out of magazines that describe them, and glue the adjectives on top of the color sections. You can see an example here.
- You can display these projects in class on a bulletin board or by suspending them from the ceiling.
- Let each student share their project with the rest of the class.
Your students will get a good review of parts of speech as they limit their descriptive words to adjectives. It’ll also give them practice introducing and talking about themselves.
14. Match the Picture
For this activity, students will work in pairs or small groups. In each group, one student will be the speaker while the others listen and draw. It works especially well for teaching prepositions, colors and sizes.
Essential Materials
- Diverse pictures that students will try to describe
- White paper for drawing (2 to 3 sheets for each student)
- Pens, pencils or crayons
Instructions
For each pair or group, choose a student with stronger language skills or one who’s comfortable speaking as the speaker. Hand the student speaker a picture—this can be anything as long as it highlights the relevant vocabulary. They should look at it but keep it hidden from the other students.
Give the other students their own piece of paper and writing utensil.
The speaker should look at his or her picture and describe it to the other student(s) in the group. The listener(s) should listen closely and draw their own versions of the picture as they hear it described. Allow them to ask questions or for repetition if necessary.
Have all the students in each group share their images. Did they draw the same thing? Why or why not? Let them talk over (in English, of course) what they got right or wrong.
Once your students get the hang of it, you can even switch roles so that each student gets to try being both the speaker and the listener over different rounds.
15. Story Swap and Sketch

You can take the previous activity one step further by using stories instead of pictures. After all, storytelling is about more than words—it also exercises students’ imaginations since stories can be visually depicted and interpreted.
Essential Materials
- 3-4 sheets of paper for each student
- Pens or pencils for writing
- Crayons or colored pencils for drawing
- Chalkboard
Instructions
- Ask each student to write a simple story on a sheet of paper.
- Once they’re done, have the students swap stories. They could randomly switch them around, rotate all their papers around in a circle or choose a buddy—it just depends on how you think they’ll focus best.
- After these stories make their way around the classroom, have students draw out the stories they’ve received to demonstrate their understanding of the stories.
- Slap those drawings on the chalkboard and have students guess at what happened in the original stories!
This gives your students two ways to exercise their creativity while honing their language skills: first, writing a story from scratch, then using images to depict that story.
16. Picture Bingo Boards
Here’s a more visual version of Bingo for your ESL class. Instead of simply recognizing numbers or generic images, students have to create their own personalized bingo cards, which stimulates both their listening skills and creativity.
Essential Materials
- Blank bingo card templates
- A theme-appropriate image for the squares
- Pens, pencils or crayons
Instructions
- Create a bingo card template with a blank image filling all the squares except for your free space. For example, if you’ve been teaching about food, put a plate in each square. If you’ve been teaching about emotions, put the silhouette of a face in each square. You can use this Picture Bingo Card Generator to help you out.
- Give your students a list of terms to use when drawing on their bingo cards. They might draw one type of food on each plate, or one emotion on each face.
- Once the cards have been filled in, play bingo! Choose items from your list randomly, read them aloud and let students cross them off or cover them when they hear the items on their cards.
- The goal is to get five drawings in a row—horizontally, vertically or diagonally. The first student to achieve this shouts “Bingo!”
This activity promotes active listening because students have to focus intently on each term called out. For variety, you can even have several rounds with different themes.
17. Pictionary
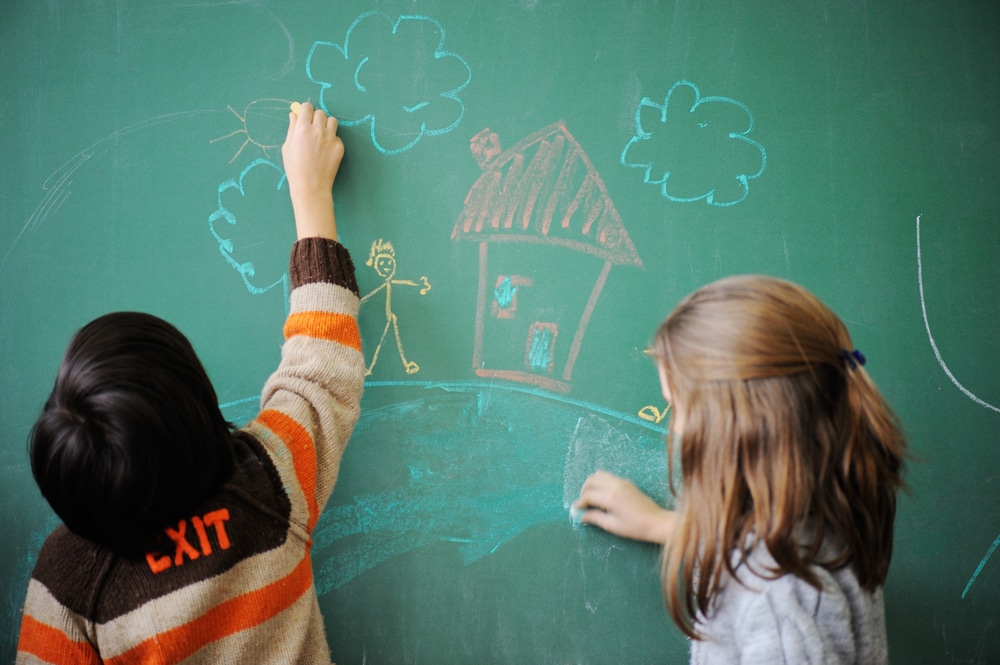
This classic game can be really fun, and you can adapt it easily for ESL learning. As students sketch out the words and phrases they know, they’ll be reinforcing their vocabulary.
Essential Materials
- Index cards
- Markers or pens for drawing
- Whiteboard or a large paper for drawing
- Timer
Instructions
- Hand out index cards and spend some time brainstorming, as a class, recent vocabulary.
- Have each student create one or more index cards with the vocabulary on them. These could be linked to a current lesson or other parts of their life (such as slang to use with your friends).
- Divide the class into two teams.
- One student from team A comes to the board with their index card and has 1 minute to draw as many words or phrases as her team can guess in that time (use a timer). Team B then takes a turn. Can the students guess what’s being drawn? Each correct answer earns one point.
For added challenge, you can include more complicated vocabulary or reduce the time limit for each drawing. You can also set some ground rules like not using letters or numbers in the drawings.
Tips for Using Art Activities in Your ESL Class
To help students improve their English through the art activities above, keep these points in mind:
Don’t translate.
The point of teaching vocabulary is for your students to practice using English as much as possible. Avoid translating certain parts of your lesson into their native tongue—this misses the point of why you’re incorporating art in the first place.
If your instructions are too complicated, then your students aren’t ready for that lesson just yet. Keep it simple, and draw things out step by step.
Encourage students to not be self-conscious.
There is really only one major worry or complaint that you’ll hear from students: “I can’t draw!” This stems from self-consciousness.
I’m not great at drawing either. In fact, my students have spent many happy moments laughing at my drawings, even with stick figures.
So I draw on the board instead—I become human. My students see that I’m not good at everything, and they also see that I’m okay showing this inability to them. This is such an important thing to model for your students—that being lousy at something isn’t a big deal.
Always introduce plenty of art-related vocabulary.
Some art-related vocabulary words you should incorporate in your lessons may include: model, frame, equipment (e.g. paintbrush, pencil, crayon, etc.), stage, performer/actor/actress, artwork, craft and imagination.
You can get inspiration from this vocabulary list by the J. Paul Getty Museum. They also have lesson plans for beginners and an image bank.
Explore other interactive resources.
You can combine art activities with other interactive resources, such as music, audio stories and short video clips. For instance, FluentU uses English videos like cartoons to teach grammar and vocabulary, with quizzes and transcripts included.
Even classic card and board games can be adapted for your ESL class.
With a touch of your own creative side, you can easily craft exceptional activities that drive home some of the most essential ESL skills.
This way, you switch up the normal pace of ESL class; your students may learn more without even noticing!
Download: This blog post is available as a convenient and portable PDF that you can take anywhere. Click here to get a copy. (Download)

